Unfortunately, little injuries and muscle strains are pretty common for us runners. Fortunately, kinesio tape can give your muscles a little extra support. But knowing how and where exactly to tape your muscles can be a bit confusing if you’ve never done it before. (Seriously, we’ve all stared perplexed at a roll of kinesio or KT tape at some point or another wondering where to even begin.)
In the videos below, Austin L. Sedicum, D.P.M., from the Upper Bucks Foot and Ankle Medical Center in Quakertown, Pennsylvania, shows you how to use KT Tape to deal with five of the most common running injuries: IT band syndrome, hamstring strains, shin splints, runner’s knee, and plantar fasciitis. If you’ve dealt with and/or are recovering from any of these issues, pair taping with these exercises for the most effective plan.
Quick note on body hair: In most cases it is not necessary to shave the skin before applying KT Tape. KT Tape’s site says that in many instances, some short hair actually can help with the adhesion as well as effectiveness of the product. If needed, the brand recommends trimming the hair to about 1/8″ rather than shaving it.
1. Iliotibial-Band Syndrome
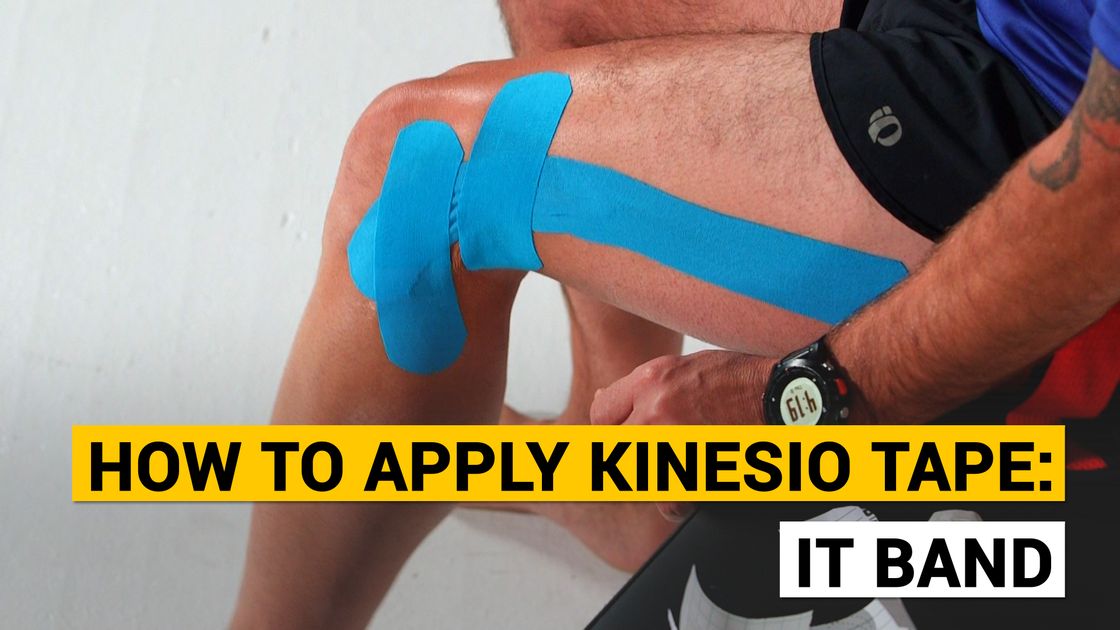
The iliotibial (IT) band is a fibrous band that runs from the outside of your knee all the way up to your hip, and when tight, it causes pain along the band from the upper knee out to the side of the hip—and sometimes a little beyond that, according to Sedicum.
To tape your IT band, cut one strip of tape that is about two-thirds the length of your thigh. This will be your anchor piece. Place the bottom end of the anchor piece right beneath the outside of your knee (or wherever you feel the most pain) and lay the tape flat going up the outside of your thigh. (Keep your knee slightly bent as you apply this piece of tape.)
Next, place a smaller strip of tape horizontally near the outside of your knee where you feel the most pain. Then place another small strip right above the last strip. Make sure you apply tension to these two small pieces of tape.
2. Hamstring Strain
Apply one strip of tape that starts on the right beneath the outside of your knee and ends at the top of your hamstring right below your glutes. Apply another strip of tape in the same way but on the opposite side. Make sure you keep your leg straight while applying the tape.
Next, place a smaller horizontal strip of tape right below the area of your hamstring where you feel the most pain—make sure you pull tightly, apply tension. Place another strip of horizontal tape (the same size as the other) right above the area of your hamstring where you feel the most pain—again pulling tightly so there is tension.
3. Shin Splints (Medial Tibial Stress Syndrome)
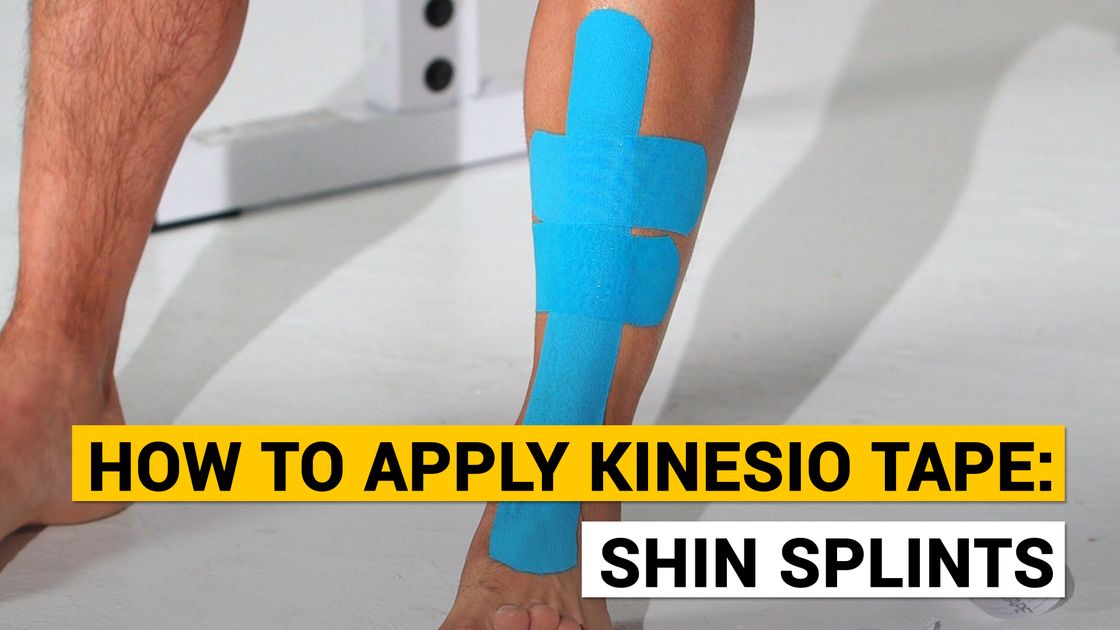
Apply one piece of tape on your shin, beginning at the top of your foot. Apply a small strip of tape horizontally across your shin, just below the area where you feel the most pain. Pull this strip tightly. Repeat this action, placing a small horizontal strip of tape just above the area where you feel the most pain.
4. Runner’s Knee (Patellofemoral Pain Syndrome)
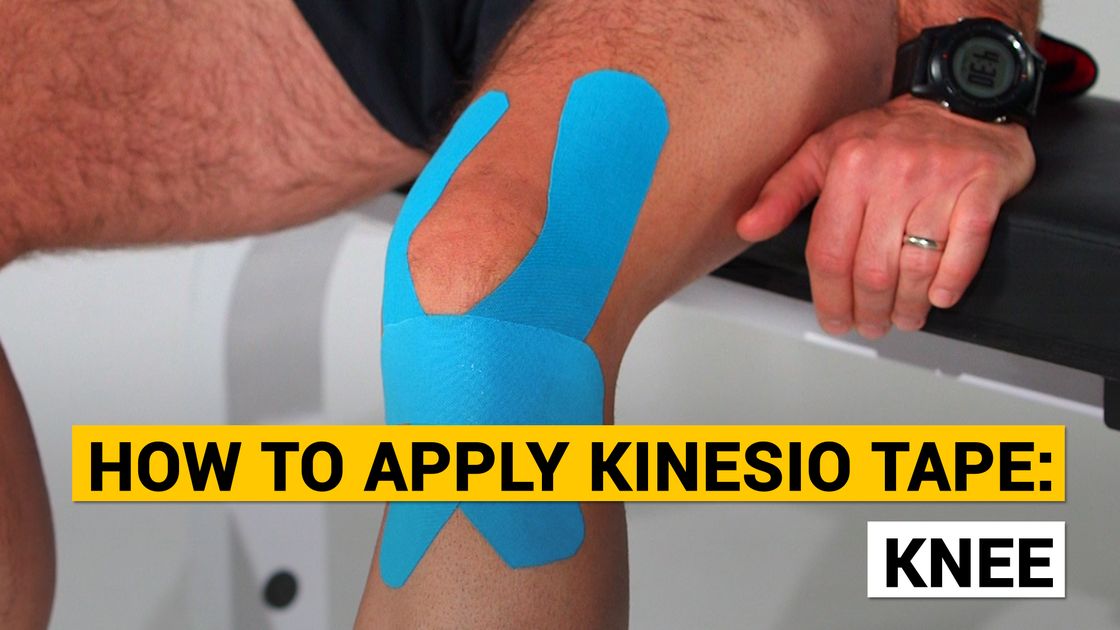
Typically, this type of pain occurs somewhere around the kneecap or patellar tendon, according to Sedicum. With your knee bent and in a slightly relaxed position, apply one strip of tape diagonally, starting right below the left side of your kneecap and up over your knee. Repeat on the other side, hugging the outside of your kneecap. Next, place a smaller horizontal strip of tape right below the area you feel the most pain and pull tightly.
5. Plantar Fasciitis
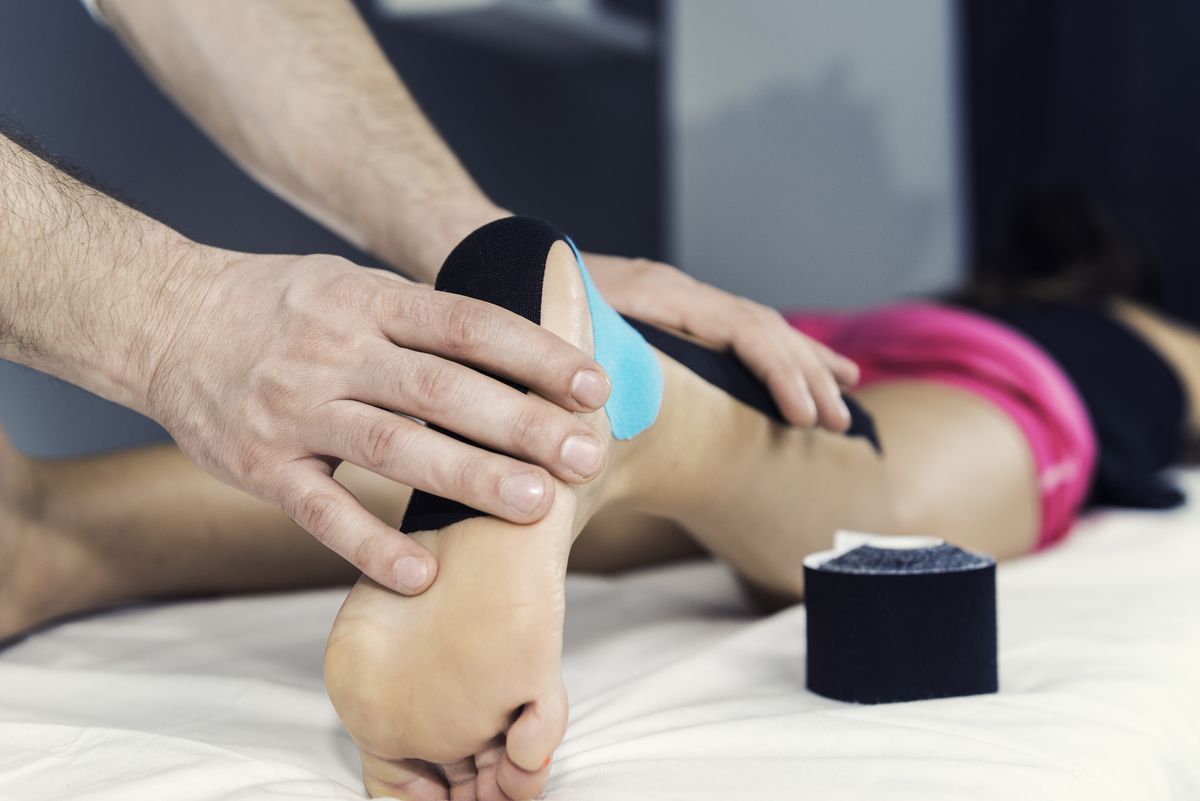
Apply one strip of tape vertically from your metatarsals all the way up over the back of your heel. Place a slightly smaller strip of tape horizontally along the bottom of your heel, pulling tightly to create tension. Repeat with new strips of horizontal tape until you have covered the entire bottom of your foot.
